Getting Started with the AWS CDK using Python
This post will give you an overview of how to setup a new AWS CDK project using Python! We’ll go over how to setup the project, bootstrap your AWS Accounts, and making your first deployment. Let’s get started!
Install the CDK CLI
Like most software these days, the CDK has a CLI for you to use in the terminal. Interestingly, this CLI is not part of the base AWS CLI and will need to be installed separately.
The easiest way to install the CLI is via npm:
npm install -g aws-cdkOr, if you’re on MacOS and prefer using Homebrew:
brew install aws-cdkOnce it’s done, you can double check that it’s installed correctly by running:
cdk --versionCreating a New CDK Project
Now that we have the CLI installed, let’s boostrap a new CDK project.
First navigate to where you want to setup your project, and then create a new directory for it:
mkdir my-cdk-projectcd my-cdk-projectIn the project directory, run the following command to create your project:
cdk init app --language python --generate-onlyIf everything is successful, you should see the CLI output something like:
Applying project template app for python
# Welcome to your CDK Python project!
This is a blank project for CDK development with Python.
The `cdk.json` file tells the CDK Toolkit how to execute your app.
This project is set up like a standard Python project.  The initializationprocess also creates a virtualenv within this project, stored under the `.venv`directory.  To create the virtualenv it assumes that there is a `python3`(or `python` for Windows) executable in your path with access to the `venv`package. If for any reason the automatic creation of the virtualenv fails,you can create the virtualenv manually.
To manually create a virtualenv on MacOS and Linux:
$ python3 -m venv .venv
After the init process completes and the virtualenv is created, you can use the followingstep to activate your virtualenv.
$ source .venv/bin/activate
If you are a Windows platform, you would activate the virtualenv like this:
% .venv\Scripts\activate.bat
Once the virtualenv is activated, you can install the required dependencies.
$ pip install -r requirements.txt
At this point you can now synthesize the CloudFormation template for this code.
$ cdk synth
To add additional dependencies, for example other CDK libraries, just addthem to your `setup.py` file and rerun the `pip install -r requirements.txt`command.
## Useful commands
 * `cdk ls`          list all stacks in the app * `cdk synth`       emits the synthesized CloudFormation template * `cdk deploy`      deploy this stack to your default AWS account/region * `cdk diff`        compare deployed stack with current state * `cdk docs`        open CDK documentation
Enjoy!
✅ All done!
Configure your Python Environment with uv
By default, the CDK will use the basic venv module to create and manage your virtual environment for Python.
However, these days the uv tool has become a popular alternative to manage not just the virtual environment, but the python project as a whole.
To get started, first make sure to install uv (if you don’t have it already, you can find the official installation instructions here).
Next, let’s initialize uv in the project directory:
uv init --bareThis will create a pyproject.toml file for our uv project will the following contents:
[project]name = "my-cdk-project"version = "0.1.0"requires-python = ">=3.14"dependencies = [](Your Python version may vary depending on what you have installed)
Now we can install the CDK dependencies by running:
uv add aws-cdk-lib constructsAnd we’ll also add pytest as a dev dependency for unit tests:
uv add --dev pytestAnd with that, we can now cleanup the generated files that were for the venv setup.
rm -rf requirements.txt requirements-dev.txt source.bat setup.pyWe can now tell the CDK to use uv to run our app by updating the cdk.json file to look like this:
{ "app": "python3 app.py", "app": "uv run app.py", // rest of cdk.json}You can verify that everything is right now by running cdk ls to list the stacks in your app. If you get any errors, double check the steps above to make sure everything is setup correctly.
Project Structure
At this point, your project structure should look something like this:
my-cdk-project/├── app.py # Main entry point for the CDK app├── cdk.json # Configuration file for the CDK CLI├── my_cdk_project/ # Directory containing the stack definition│ ├── __init__.py│ └── my_cdk_project_stack.py # Stack definition file├── README.md # Project README file├── pyproject.toml # uv project configuration file├── .venv/ # Python virtual environment└── tests/ # Directory for unit tests ├── __init__.py └── test_my_cdk_project_stack.py # Unit tests for the stackapp.py is the main entry point for our CDK app, this is where the actual CDK App class is initialized and setup.
cdk.json is the main CDK config file, this has a couple of important things in it:
- The
appfield tells CDK run your code (this is what we changed to useuv). - The
watchfield tells the CDK which files to monitor for changes in watch mode. - The
contextfield is a list of feature flags set by the CDK.
The my_cdk_project/ directory contains the actual stack definition for our CDK app. This is where we’ll be setting up our stacks for our infrastructure. (This will be named whatever your actual project is named)
The tests/ directory is where we can add unit tests for our CDK stacks using pytest.
Writing Infra-as-Code with the CDK
Now we can start defining our infrastructure using the CDK!
Let’s start by first defining our first stack. In the CDK, a Stack is a collection of AWS resources that always get deployed together. For the sake of this example, we’re going to create a very simple example with a single resource: an S3 Bucket.
Before we get started, we can remove our generated stack file since we won’t be using it:
rm my_cdk_project/my_cdk_project_stack.pyNow create a module directory for our stacks and create a new file for our first stack:
mkdir my_cdk_project/stackstouch my_cdk_project/stacks/__init__.pytouch my_cdk_project/stacks/app_stack.pyLet’s add our infra-as-code:
import aws_cdk as cdkfrom aws_cdk import aws_s3 as s3
class AppStack(cdk.Stack):    def __init__(self, stage: cdk.Stage) -> None:        super().__init__(stage, 'app')
        s3.Bucket(self, "example-bucket",            bucket_name="bcdk-example-bucket-123456",            versioned=True,        )
Great! We now have our first stack, but before we can add it to our app we should first define a Stage for our stack to be able to specify where it’s going to deploy to.
Defining a Stage
Let’s create a new module directory for our stages and create a new file for our first stage:
mkdir my_cdk_project/stagestouch my_cdk_project/stages/__init__.pytouch my_cdk_project/stages/dev_stage.pyWe’re going to assume for this example that the AWS Account we’re deploying to is our “Development” environment.
import aws_cdk as cdk
class DevStage(cdk.Stage):    def __init__(self, app: cdk.App) -> None:        super().__init__(app, 'dev',            env=cdk.Environment(                account='YOUR ACCOUNT ID HERE',                region='us-east-1'            )        )
Make sure to replace YOUR ACCOUNT ID HERE with your actual AWS Account ID.
If you don’t know your AWS Account ID, you can run the following command using the AWS CLI to get it:
aws sts get-caller-identity --query Account --output textNow that we have our stage defined to tell the CDK where to deploy to, we can finally add both our stage and stack to our CDK app:
import aws_cdk as cdkfrom my_cdk_project.stages.dev_stage import DevStagefrom my_cdk_project.stacks.app_stack import AppStack
app = cdk.App()dev = DevStage(app)
AppStack(dev)
app.synth()
This is all looking good, we’re now ready to deploy!
Bootstrapping the AWS Account
Before we can deploy anything, we first need to “bootstrap” the AWS Account.
This is just a one-time setup step that the CDK requires us to do every time we want to deploy to a new AWS Account and Region.
Luckily it’s just a single command:
cdk bootstrap aws://YOUR-ACCOUNT-ID/us-east-1(Make sure you of course to replace YOUR-ACCOUNT-ID and have proper credentials setup in your terminal)
But what is this actually doing, and why do we need to do it?
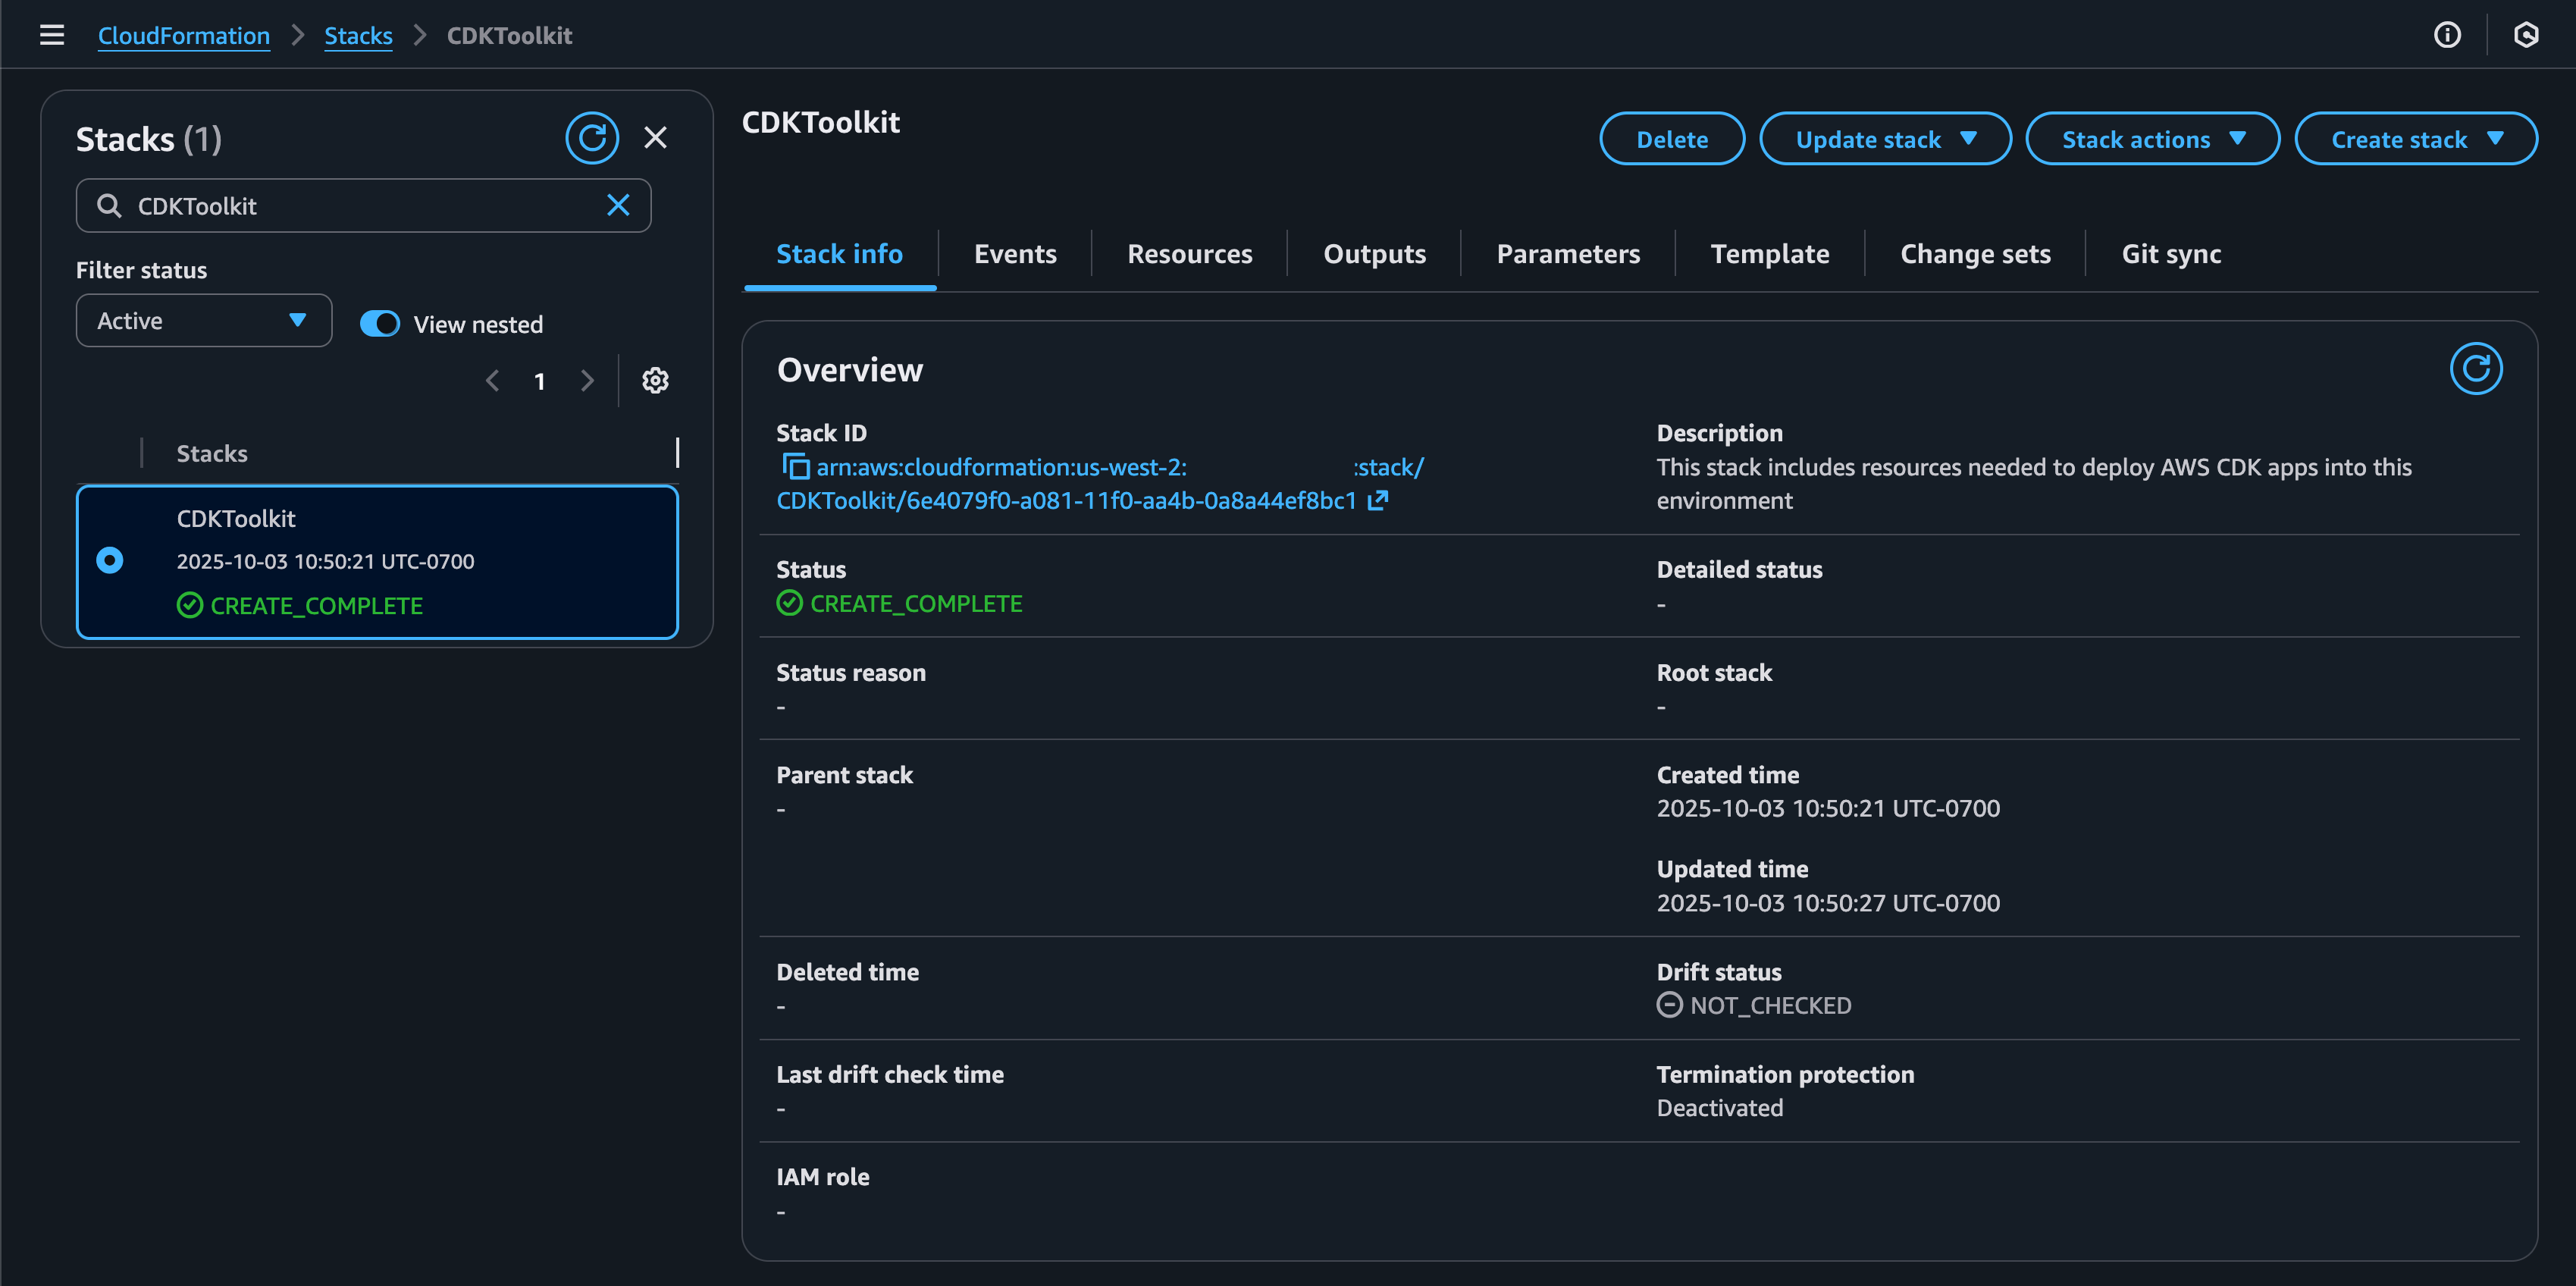
Under the hood, the CDK runs on top of CloudFormation. This “bootstrapping” setup is creating a dedicated CFN stack in your AWS Account that contains a bunch of metadata and resources (like an S3 bucket for storing assets) that the CDK needs to be able to deploy your infrastructure.
We can verify this by going to the CFN console and looking for a stack called CDKToolkit in the same Account and Region we just bootstrapped.
Deploying your First Stack
Okay, now we’re actually ready to deploy that first stack!
We can double check that things are setup correctly by looking at the list of stacks in our CDK app:
cdk listWe should see it output this:
dev/app (dev-app)This is how we reference our stack when using the CDK CLI, using this <stage>/<stack> format.
One good habit you should get used to doing every time before deploying is to run a diff for the stack you’re deploying to verify it’s what you expect to happen.
cdk diff dev/appThis should output something like:
Stack dev/app (dev-app)Parameters[+] Parameter app/BootstrapVersion BootstrapVersion: {"Type":"AWS::SSM::Parameter::Value<String>","Default":"/cdk-bootstrap/hnb659fds/version","Description":"Version of the CDK Bootstrap resources in this environment, automatically retrieved from SSM Parameter Store. [cdk:skip]"}
Resources[+] AWS::S3::Bucket app/example-bucket examplebucketC9DFA43E
✨  Number of stacks with differences: 1
There we go, our S3 Bucket is there just like we expected! But we also get this BootstrapVersion as well, what is this?
Without getting into the weeds, this is just the CDK’s internal way of keeping track of the current CDK version difference between whats been deployed compared to what CLI version you’re using. That’s all, you should only see this the first time you deploy a stack or when the CDK version has changed.
Great, this looks good, now lets deploy it!
cdk deploy dev/appAssuming it completes successfully, you should see output like this:
✨ Synthesis time: 2.3s
dev-app: start: Building dev-app Templatedev-app: success: Built dev-app Templatedev-app: start: Publishing dev-app Template (************-us-east-1-661ffe41)dev-app: success: Published dev-app Template (************-us-east-1-661ffe41)dev/app (dev-app): deploying... [1/1]dev-app: creating CloudFormation changeset...
✅ dev/app (dev-app)
✨ Deployment time: 30.83s
Stack ARN:arn:aws:cloudformation:us-east-1:************:stack/dev-app/bc473560-da44-11f0-925f-06fbb7992bc3
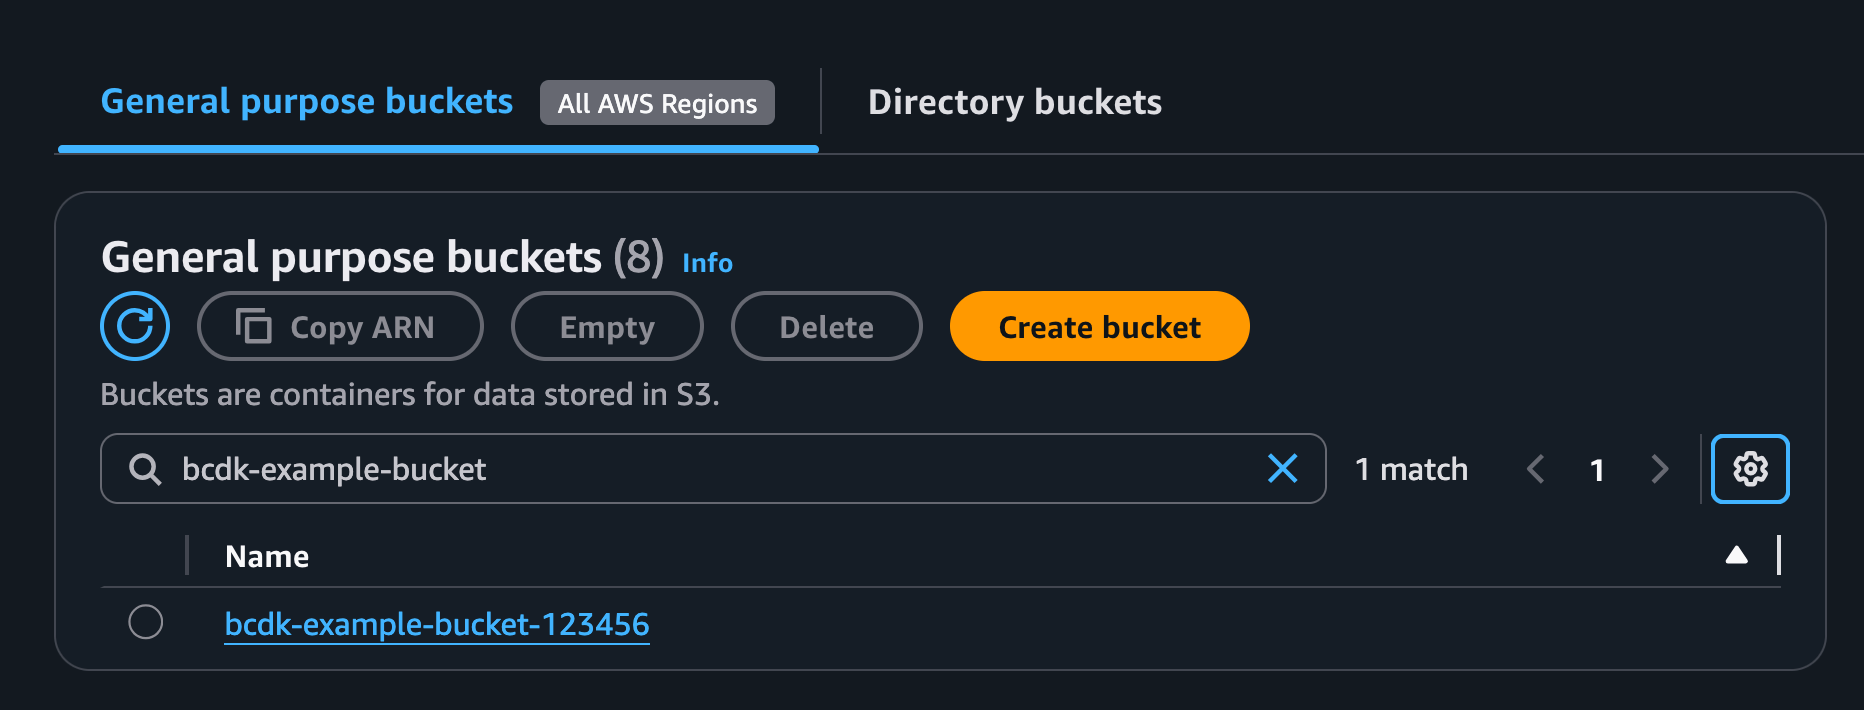
✨ Total time: 33.13sAnd that’s it! If we go to S3, we should now see our new bucket that we just deployed!
We can also go into CloudFormation and see our deployed stack there as well:

And that’s it! You’re now all setup to start building with the AWS CDK using Python!
Want to skip all that and just grab the code? It’s available on GitHub!
https://github.com/brandonburrus/buildcdk-examples/tree/getting-started-with-aws-cdk-python